FFmpeg Cheatsheet 2026: Modern Streaming, Packaging, and Command-Line Sorcery

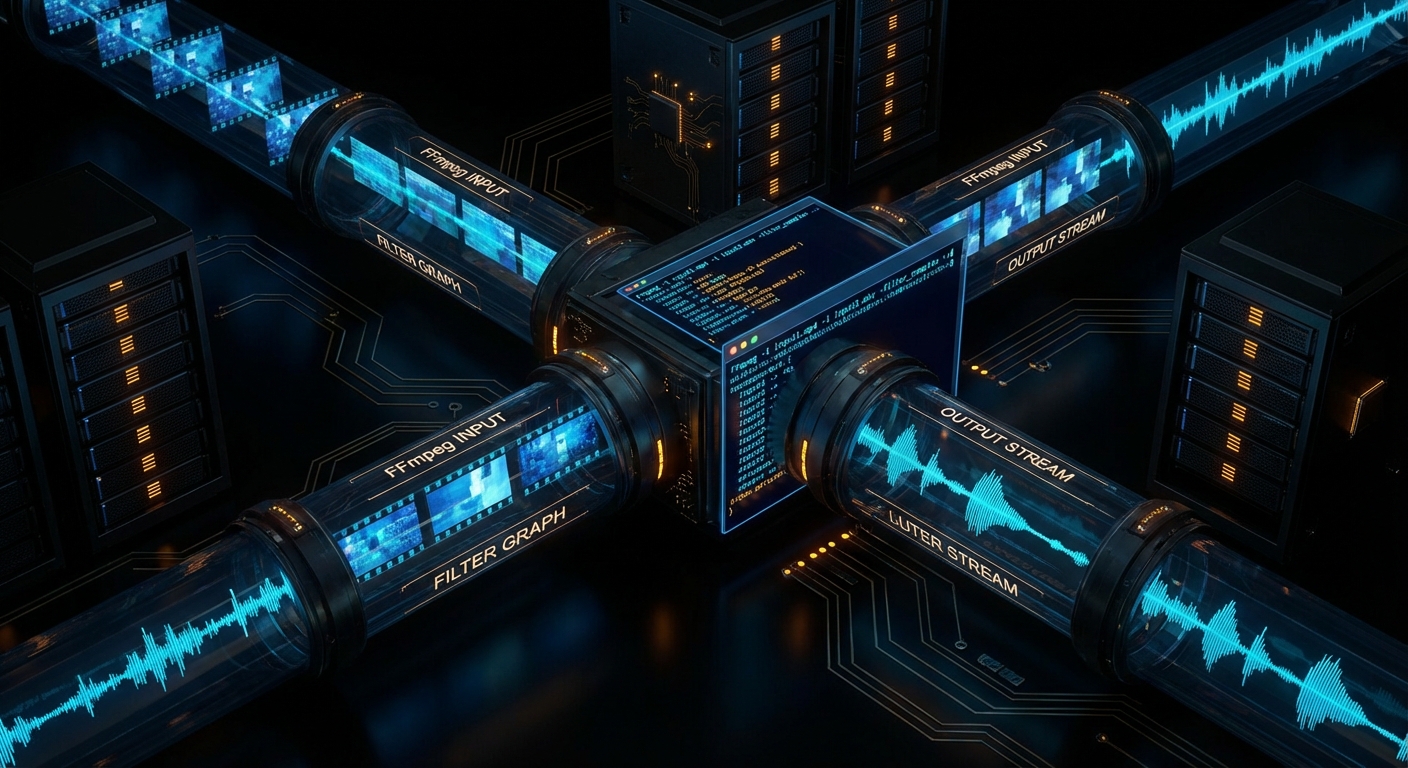
FFmpeg is what happens when a Swiss Army knife gets a PhD in multimedia and then refuses to use a GUI. It can inspect, trim, remux, transcode, filter, normalise, package, stream, and automate media pipelines with almost rude efficiency. The catch is that it speaks in a grammar that is perfectly logical and completely uninterested in your vibes. Put one option in the wrong place and FFmpeg will not “figure it out”. It will hand you a lesson in command-line causality.

This version is built to be kept open in a tab: a smarter cheatsheet, a modern streaming reference, a compact guide to the commands worth memorising, and a curated collection of official docs plus a few YouTube resources that are actually worth your time. We will cover the fast path, the dangerous path, and the production path.

Dark technical visualisation of FFmpeg processing audio and video streams
FFmpeg in one picture: streams go in, decisions get made, codecs either behave or get replaced.

First Principles: How FFmpeg Actually Thinks

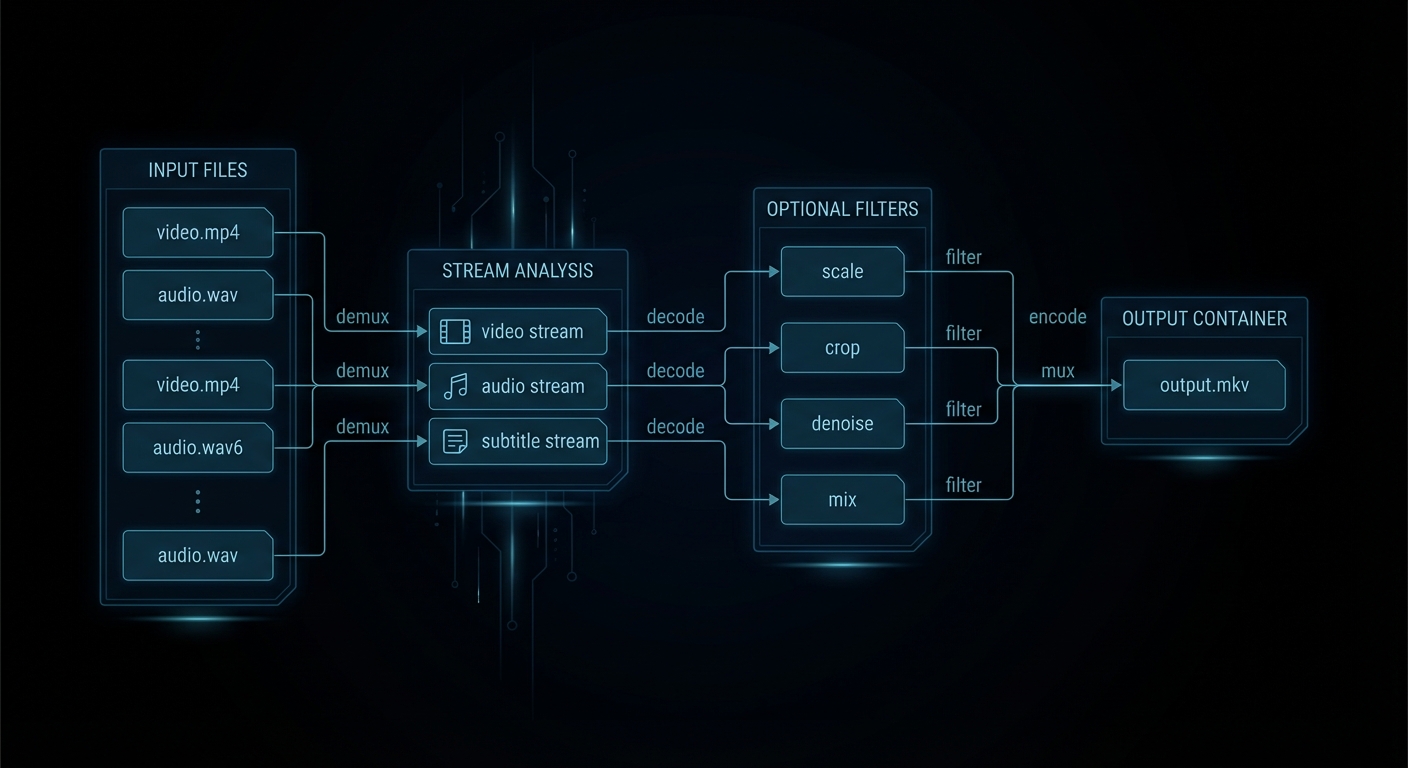
Most FFmpeg confusion begins with the wrong mental model. Humans think in files. FFmpeg thinks in inputs, streams, codecs, filters, mappings, and outputs. A single file can contain several streams: video, multiple audio tracks, subtitles, chapters, timed metadata. FFmpeg lets you inspect that structure, choose what to keep, decode only what needs changing, then write a new container deliberately.

The core trio is simple. ffmpeg transforms media. ffprobe tells you what is actually in the file. ffplay previews quickly. The smartest FFmpeg habit is also the least glamorous: ffprobe first, ffmpeg second. Guessing stream layout is how people end up with silent video, the wrong commentary track, or subtitles that evaporate on contact with MP4.

“As a general rule, options are applied to the next specified file. Therefore, order is important, and you can have the same option on the command line multiple times.” – FFmpeg Documentation, ffmpeg manual

That rule explains most self-inflicted FFmpeg pain. Input options belong before the input they affect. Output options belong before the output they affect. You are not writing prose. You are wiring a pipeline.

ffmpeg [global-options] \
  [input-options] -i input1 \
  [input-options] -i input2 \
  [filter-and-map-options] \
  [output-options] output.ext

The other distinction worth burning into memory is container versus codec. MP4, MKV, MOV, WebM, TS, and M4A are containers. H.264, HEVC, AV1, AAC, Opus, MP3, ProRes, and DNxHR are codecs. Containers are boxes. Codecs are how the contents were compressed. A huge fraction of “FFmpeg is broken” reports are really “I changed the box and forgot the contents still have rules”.

Dark diagram showing FFmpeg command flow from input to streams to filters to output
The command-flow model: inspect streams, decide what gets copied, decide what gets filtered, then write the output on purpose.

The Fast Lane: Steal These Commands First

If you only memorise a dozen FFmpeg moves, make them these. They cover the majority of real-world jobs: inspect, copy, trim, transcode, subtitle, extract, package, and deliver.

Job Command Use it when
Inspect a file properly ffprobe -hide_banner input.mkv You want the truth about streams before touching anything.
Get scriptable metadata ffprobe -v error -show_streams -show_format -of json input.mp4 Automation, CI, or conditional workflows.
Remux without quality loss ffmpeg -i input.mkv -c copy output.mp4 The streams are already compatible, you just need a different container.
Trim quickly ffmpeg -ss 00:01:30 -i input.mp4 -t 20 -c copy clip.mp4 Speed matters more than perfect frame accuracy.
Trim accurately ffmpeg -i input.mp4 -ss 00:01:30 -t 20 -c:v libx264 -crf 18 -c:a aac clip.mp4 Tutorial clips, ad boundaries, subtitle-sensitive edits.
Good default MP4 for the web ffmpeg -i input.mov -c:v libx264 -preset slow -crf 20 -c:a aac -b:a 192k -movflags +faststart output.mp4 You need a boring, reliable, browser-friendly output. Boring is a compliment here.
Resize while keeping aspect ratio ffmpeg -i input.mp4 -vf "scale=1280:-2" -c:v libx264 -crf 20 -c:a aac output.mp4 Social uploads, previews, smaller delivery files.
Extract audio ffmpeg -i input.mp4 -vn -c:a copy audio.m4a The source audio codec already fits the target container.
Normalise speech ffmpeg -i input.wav -af "loudnorm=I=-16:TP=-1.5:LRA=11" output.wav Podcasts, tutorials, voice-overs, screen recordings.
Burn subtitles in ffmpeg -i input.mp4 -vf "subtitles=subs.srt" -c:v libx264 -crf 18 -c:a copy output.mp4 You need one universal file and do not trust player subtitle support.
Contact sheet ffmpeg -i input.mp4 -vf "fps=1/10,scale=320:-1,tile=4x4" -frames:v 1 sheet.png Fast content review without watching the whole thing.
Concatenate matching files ffmpeg -f concat -safe 0 -i files.txt -c copy merged.mp4 Inputs share compatible codecs and parameters.

“Streamcopy is useful for changing the elementary stream count, container format, or modifying container-level metadata. Since there is no decoding or encoding, it is very fast and there is no quality loss.” – FFmpeg Documentation, ffmpeg manual

If you remember one performance trick, remember -c copy. It is the difference between “done in a second” and “let me hear all your laptop fans introduce themselves”.

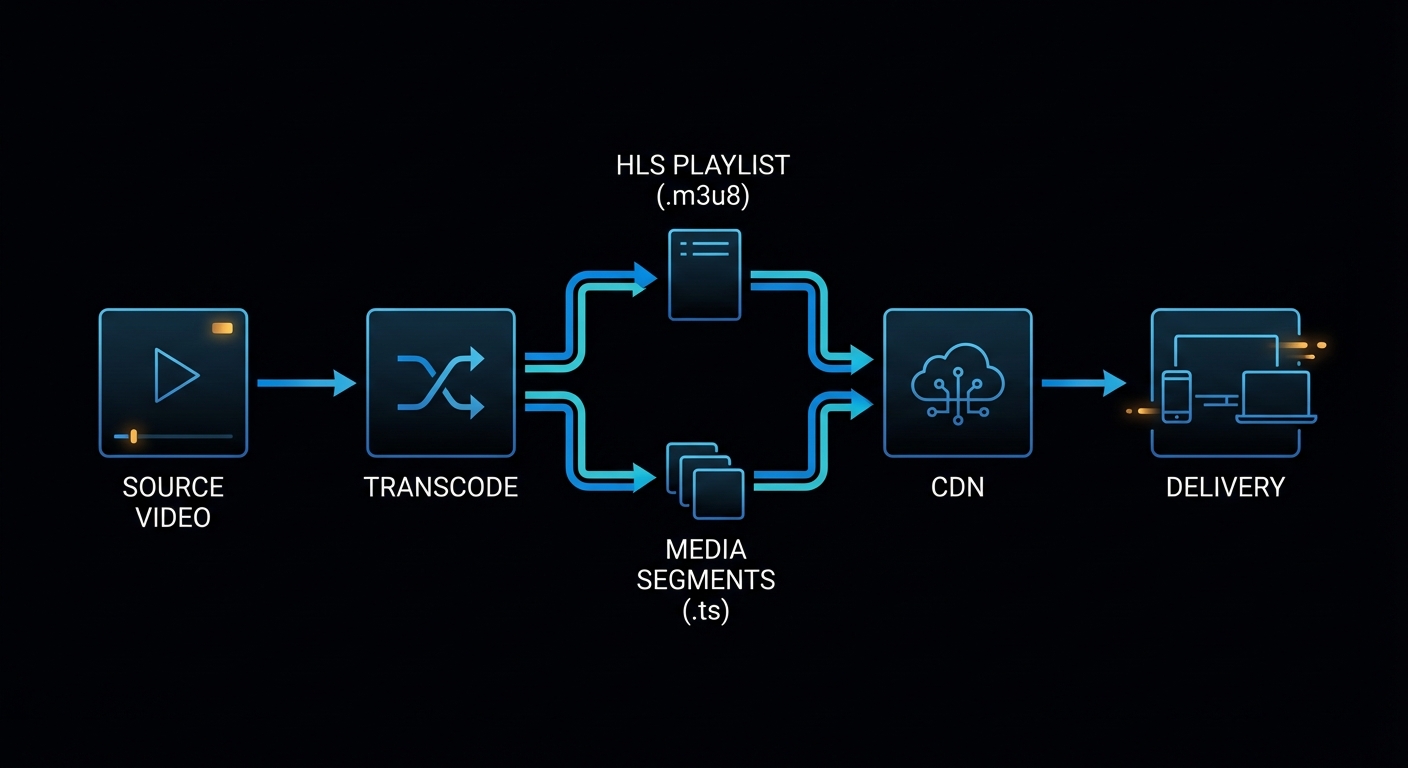
Modern FFmpeg: Streaming, Packaging, and Delivery in 2026

This is where a lot of older FFmpeg write-ups feel dusty. Modern usage is not just “convert AVI to MP4”. It is packaging for adaptive streaming, feeding live ingest pipelines, generating web-safe delivery files, and choosing the correct transport for the job instead of shouting at RTMP because it was popular in 2014.

“Apple HTTP Live Streaming muxer that segments MPEG-TS according to the HTTP Live Streaming (HLS) specification.” – FFmpeg Formats Documentation, HLS muxer

“WebRTC (Real-Time Communication) muxer that supports sub-second latency streaming according to the WHIP (WebRTC-HTTP ingestion protocol) specification.” – FFmpeg Formats Documentation, WHIP muxer

That is the modern landscape in miniature. FFmpeg is not only a transcoder. It is a packaging and transport tool. Use the right mode for the latency, compatibility, and scale you actually need.

Goal Best fit Starter command
Simple browser playback MP4 with H.264/AAC ffmpeg -i in.mov -c:v libx264 -crf 20 -c:a aac -movflags +faststart out.mp4
Adaptive VOD streaming HLS or DASH ffmpeg -i in.mp4 -c:v libx264 -c:a aac -hls_time 6 -hls_playlist_type vod stream.m3u8
Traditional live platform ingest RTMP ffmpeg -re -i in.mp4 -c:v libx264 -c:a aac -f flv rtmp://server/app/key
More robust live transport over messy networks SRT ffmpeg -re -i in.mp4 -c:v libx264 -c:a aac -f mpegts "srt://host:port?mode=caller&latency=2000000"
Sub-second browser ingest WHIP / WebRTC ffmpeg -re -i in.mp4 -c:v libx264 -c:a opus -f whip "http://whip-endpoint.example/whip"

Here are the practical streaming recipes worth saving.

HLS VOD

ffmpeg -i input.mp4 \
  -c:v libx264 -preset medium -crf 22 \
  -c:a aac -b:a 128k \
  -hls_time 6 \
  -hls_playlist_type vod \
  -hls_segment_filename "seg-%03d.ts" \
  stream.m3u8

DASH Packaging

ffmpeg -i input.mp4 \
  -c:v libx264 -preset medium -crf 22 \
  -c:a aac -b:a 128k \
  -f dash \
  manifest.mpd

RTMP Ingest

ffmpeg -re -i input.mp4 \
  -c:v libx264 -preset veryfast -b:v 4500k -maxrate 4500k -bufsize 9000k \
  -c:a aac -b:a 160k \
  -f flv rtmp://server/app/stream-key

SRT Ingest

ffmpeg -re -i input.mp4 \
  -c:v libx264 -preset veryfast -b:v 4500k \
  -c:a aac -b:a 160k \
  -f mpegts "srt://example.com:9000?mode=caller&latency=2000000"

That latency value is in microseconds, which is the kind of small detail that turns a calm afternoon into a surprisingly educational one.

WHIP / WebRTC Ingest

ffmpeg -re -i input.mp4 \
  -c:v libx264 -preset veryfast \
  -c:a opus -b:a 128k \
  -f whip "https://whip.example.com/rtc/v1/whip/?app=live&stream=demo"

WHIP is interesting because it reflects the current internet, not the old one. If your target is low-latency browser delivery, WHIP and WebRTC are now part of the real conversation, not just interesting acronyms for protocol collectors.

Dark streaming pipeline diagram showing input transcoding into HLS segments and playlist
Modern FFmpeg is packaging plus transport plus compatibility engineering, not just transcoding.

Hardware Acceleration Without Lying to Yourself

Modern FFmpeg usage also means knowing when to use hardware encoders. They are fantastic when throughput matters: live streaming, batch transcoding, preview generation, cloud pipelines, and “I have 800 files and would prefer not to age visibly today”. They are not always the best answer for maximum compression efficiency or highest archival quality.

The practical rule is simple. If you need the best quality-per-bit, software encoders like libx264, libx265, and libaom-av1 still matter. If you need speed and acceptable quality, hardware encoders are often the right move.

Platform Common encoder Example
NVIDIA h264_nvenc, hevc_nvenc, sometimes AV1 on newer cards ffmpeg -i in.mp4 -c:v h264_nvenc -b:v 6M -c:a aac out.mp4
Intel / AMD on Linux h264_vaapi, hevc_vaapi ffmpeg -hwaccel vaapi -hwaccel_output_format vaapi -i in.mp4 -c:v h264_vaapi -b:v 6M out.mp4
macOS h264_videotoolbox, hevc_videotoolbox ffmpeg -i in.mp4 -c:v h264_videotoolbox -b:v 6M -c:a aac out.mp4

The mistake people make is assuming hardware encode means “same quality, just faster”. Often it means “faster, different tuning, sometimes larger bitrate for comparable quality”. Be honest about the trade-off. This is not a moral issue. It is an engineering one.

Failure Cases That Keep Reappearing

Hunt and Thomas argue in The Pragmatic Programmer that good tools reward understanding over superstition. FFmpeg is one of the clearest examples of that principle on the command line. Here are the mistakes that keep burning people because they look plausible until you understand what FFmpeg is actually doing.

Case 1: You Wanted Speed, but Also Expected Frame Accuracy

Putting -ss before -i is fast. It is often not frame-accurate. That is a feature, not a betrayal.

# Fast, usually keyframe-aligned
ffmpeg -ss 00:10:00 -i input.mp4 -t 15 -c copy clip.mp4

If you need surgical cuts, decode and re-encode.

ffmpeg -i input.mp4 -ss 00:10:00 -t 15 \
  -c:v libx264 -crf 18 -c:a aac \
  clip-accurate.mp4

Case 2: You Asked for a Filter and Also Asked Not to Decode Anything

Filters need decoded frames. Stream copy avoids decoding. These are incompatible desires, not a creative workflow.

# Contradiction in command form
ffmpeg -i input.mp4 -vf "scale=1280:-2" -c copy output.mp4

The corrected pattern is to re-encode video and copy audio if it stays untouched.

ffmpeg -i input.mp4 -vf "scale=1280:-2" \
  -c:v libx264 -crf 20 \
  -c:a copy \
  output.mp4

Case 3: FFmpeg Picked the Wrong Streams Because You Left It to Fate

Auto-selection works until the source has multiple languages, commentary, descriptive audio, or subtitles. At that point, the polite thing to do is map explicitly.

# Ambiguous and sometimes unlucky
ffmpeg -i movie.mkv -c copy output.mp4
ffprobe -hide_banner movie.mkv

ffmpeg -i movie.mkv \
  -map 0:v:0 \
  -map 0:a:0 \
  -map 0:s:0? \
  -c:v copy -c:a copy -c:s mov_text \
  output.mp4

Case 4: Your Filtergraph Became Punctuation Soup

Once you move into -filter_complex, labels stop being optional niceties. They become the difference between clarity and a future headache.

# Hard to reason about
ffmpeg -i main.mp4 -i logo.png -i music.wav \
  -filter_complex "[0:v][1:v]overlay=20:20,scale=1280:-2;[2:a]volume=0.25[a]" \
  -map 0:v -map "[a]" output.mp4

Break the graph into named stages.

ffmpeg -i main.mp4 -i logo.png -i music.wav \
  -filter_complex "\
    [0:v][1:v]overlay=20:20[branded]; \
    [branded]scale=1280:-2[vout]; \
    [2:a]volume=0.25[aout]" \
  -map "[vout]" -map "[aout]" \
  -c:v libx264 -crf 20 -c:a aac \
  output.mp4
Dark diagram of FFmpeg filtergraph with labelled nodes and branches
Filtergraphs stop being scary the moment you read them as labelled dataflow instead of punctuation.

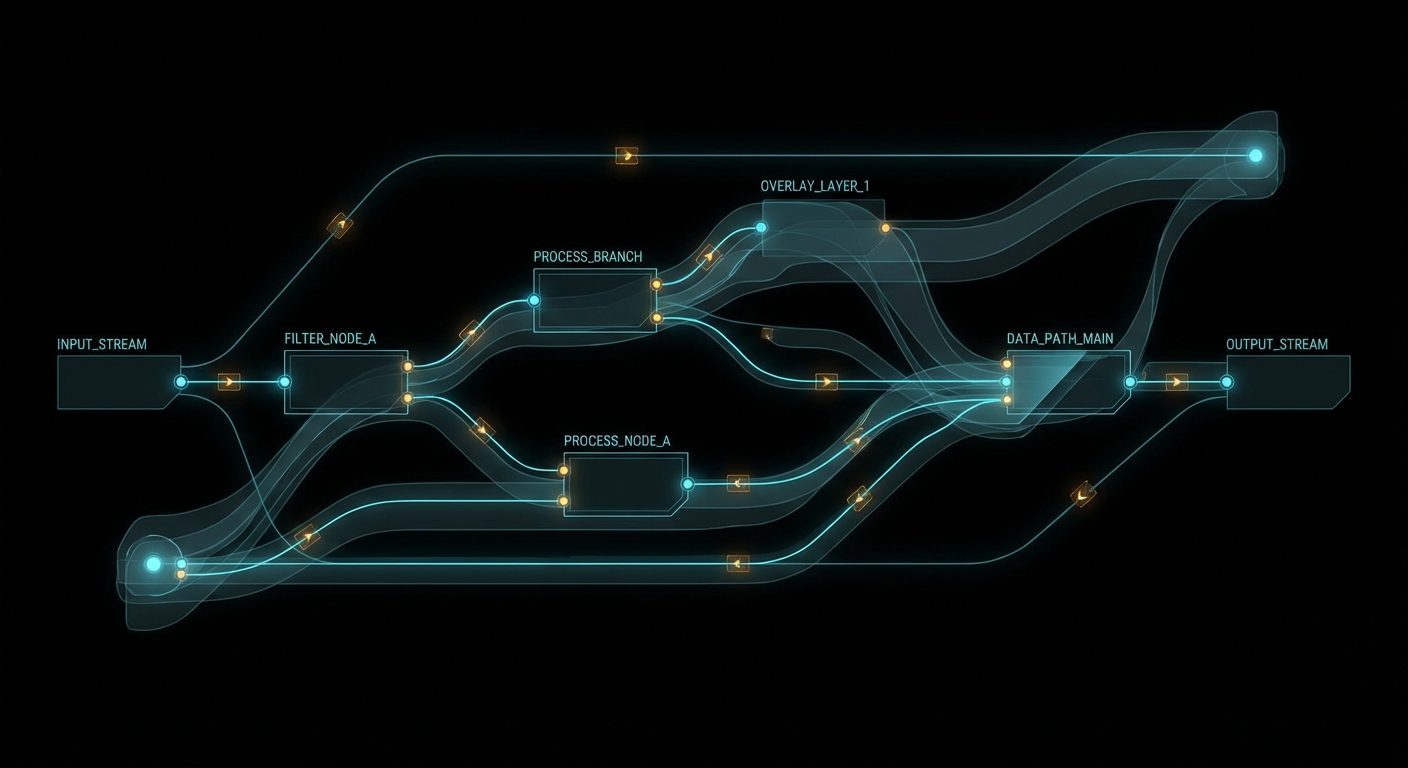
The Best Collection to Bookmark

If you want the strongest FFmpeg learning stack from basic to advanced, use this order. Not because it is trendy, but because it respects how people actually learn complicated tools: truth first, intuition second, repetition third.

  1. FFmpeg documentation portal – the source of truth for manuals, components, and the official reference tree.
  2. ffmpeg manual – command order, stream copy, mapping, options, and the grammar of the tool.
  3. ffprobe documentation – essential if your work is even slightly automated.
  4. FFmpeg filters documentation – the real reference once you graduate from single-flag edits.
  5. FFmpeg formats documentation – where modern packaging, HLS, DASH, and WHIP start becoming concrete.
  6. FFmpeg protocols documentation – required reading once live ingest and transport enter the picture.
  7. STREAM MAPPING with FFMPEG – Everything You Need to Know – one of the best targeted explainers on a concept that causes disproportionate pain.
  8. FFMPEG & Filter Complex: A Visual Guide to the Filtergraph Usage – useful once the commands stop being linear.
  9. FFmpeg FILTERS: How to Use Them to Manipulate Your Videos – a solid bridge from basic edits to compositional thinking.
  10. Video and Audio Processing in FFMPEG – useful if you learn best by revisiting the topic from multiple angles.

The rule is simple: use YouTube for intuition, use the official docs for truth. The people who confuse those two categories usually end up with very confident commands and very confusing output.

What to Check Right Now

  • Adopt one boring, reliable web delivery recipe – H.264, AAC, and -movflags +faststart will solve more problems than exotic cleverness.
  • Use ffprobe before every important transcode – that one habit prevents a ridiculous amount of avoidable breakage.
  • Reach for -c copy first when no transformation is needed – it is faster and lossless, which is suspiciously close to magic.
  • Move from RTMP-only thinking to transport-aware thinking – HLS for compatibility, DASH for adaptive packaging, SRT for rougher networks, WHIP for low-latency browser workflows.
  • Pick hardware encoders when throughput matters and software encoders when efficiency matters – this is the real trade-off, not ideology.
  • Build a private snippets file – five good FFmpeg recipes will do more for your sanity than fifty vague memories.

FFmpeg rewards the same engineering habit that every serious tool rewards: inspect first, be explicit, automate the boring parts, and choose the transport and packaging that fit the real system in front of you. Do that and FFmpeg stops feeling like cryptic wizardry and starts feeling like infrastructure. Which is exactly what it is.

nJoy 😉

WordPress Performance: How to Hit 100 on PageSpeed Without Touching the Cloud

WordPress ships slow. Not broken-slow, but “a friend who takes 4 seconds to answer a yes/no question” slow. The default stack serves every request through PHP, loads jQuery plus its migration shim for a site that hasn’t used jQuery 1.x in a decade, ships full-resolution images to mobile screens, and trusts the browser to figure out layout before it has seen a single pixel. Google’s PageSpeed Insights will hand you a score in the 40s and a wall of red, and you’ll spend an afternoon convinced the problem is your hosting. It is not. This guide walks through every layer of the fix, from OPcache to image compression to full-page static caching, and explains exactly why each one moves the needle.

WordPress performance dashboard showing a score climbing from red to green 100
From a 49 on mobile to 95+: what a full stack optimisation actually looks like.

What PageSpeed Is Actually Measuring

Before you touch a file, understand what you are chasing. PageSpeed Insights (backed by Lighthouse) reports five metrics, each targeting a distinct user experience moment:

  • First Contentful Paint (FCP) — the moment the browser renders any content at all. Dominated by render-blocking CSS and JS in the <head>.
  • Largest Contentful Paint (LCP) — when the biggest visible element finishes loading. Usually your hero image or a large heading. Google’s threshold for “good” is under 2.5 seconds.
  • Total Blocking Time (TBT) — the sum of all long tasks on the main thread between FCP and Time to Interactive. Every JavaScript file parsed synchronously contributes here. Zero is the target.
  • Cumulative Layout Shift (CLS) — how much the page jumps around as assets load. Images without explicit width and height attributes are the most common culprit. Target: under 0.1.
  • Speed Index — a composite of how fast the visible content populates. Think of it as the integral under the FCP curve.

“LCP measures the time from when the page first starts loading to when the largest image or text block is rendered within the viewport.” — web.dev, Largest Contentful Paint (LCP)

The audit starts with a fresh Chrome incognito load over a throttled 4G connection. Any caching your browser has built up is irrelevant; PageSpeed is measuring the cold-load experience of a first-time visitor on a mediocre phone connection. Every millisecond counts from the first TCP packet.

Layer 1: Images — The Biggest Win by Far

Images are almost always the single largest contributor to poor LCP on a self-hosted WordPress blog. A typical upload flow is: photographer exports a 4000×3000 JPEG at 90% quality, editor uploads it via the WordPress media library, WordPress generates a handful of named thumbnails but leaves the original untouched, and the theme serves the full 8 MB original to every visitor. The browser then scales it down in CSS. The bytes still travel across the wire.

Case 1: Full-Resolution Originals Served to Every Visitor

When a theme uses get_the_post_thumbnail_url() without specifying a size, or uses a custom field storing the original upload URL, WordPress happily hands out the unprocessed original.

# Find images over 200KB in your uploads directory
find /var/www/html/wp-content/uploads -name "*.jpg" -size +200k | wc -l

# Batch-resize and compress in place with ImageMagick
# Max 1600px wide, JPEG quality 75, strip metadata
find /var/www/html/wp-content/uploads -name "*.jpg" -o -name "*.jpeg" | \
  xargs -P4 -I{} mogrify -resize '1600x>' -quality 75 -strip {}

find /var/www/html/wp-content/uploads -name "*.png" | \
  xargs -P4 -I{} mogrify -quality 85 -strip {}

On a typical blog, this step alone drops total image payload by 60–80%. Run it, clear your cache, and re-run PageSpeed before touching anything else. On this site, 847 images went from an average of 380 KB down to 62 KB.

Case 2: Images Without Width and Height Attributes (CLS Killer)

The browser cannot reserve space for an image before it downloads if the HTML does not declare its dimensions. The result: as images load in, everything below them jumps down the page. Google counts every pixel of that shift against your CLS score.

WordPress 5.5+ adds these attributes for images inserted via the block editor, but anything in post content from older posts, theme templates, or plugins is a wildcard. The fix is a PHP filter that scans every <img> tag and injects dimensions if they are missing:

add_filter( 'the_content',         'sudoall_add_image_dimensions', 98 );
add_filter( 'post_thumbnail_html', 'sudoall_add_image_dimensions', 98 );

function sudoall_add_image_dimensions( $content ) {
    return preg_replace_callback(
        '/]+>/i',
        function( $matches ) {
            $tag = $matches[0];
            // Skip if dimensions already present
            if ( preg_match( '/\bwidth\s*=/i', $tag ) && preg_match( '/\bheight\s*=/i', $tag ) ) {
                return $tag;
            }
            if ( ! preg_match( '/\bsrc\s*=\s*["\'](https?[^"\']+)["\']/', $tag, $src_match ) ) {
                return $tag;
            }
            $src = $src_match[1];
            // Only handle uploads — leave external images alone
            if ( strpos( $src, '/wp-content/uploads/' ) === false ) return $tag;

            // 1. Parse dimensions from WP-generated filename (e.g. image-300x200.jpg)
            if ( preg_match( '/-(\d+)x(\d+)\.[a-z]{3,4}(?:\?.*)?$/i', $src, $dim ) ) {
                $w = (int) $dim[1]; $h = (int) $dim[2];
            } else {
                // 2. Fallback: read from file on disk
                $upload_dir = wp_upload_dir();
                $file = str_replace( $upload_dir['baseurl'], $upload_dir['basedir'], $src );
                if ( ! file_exists( $file ) ) return $tag;
                $size = @getimagesize( $file );
                if ( ! $size ) return $tag;
                list( $w, $h ) = $size;
            }
            return preg_replace( '/(\s*\/?>)$/', " width=\"{$w}\" height=\"{$h}\"$1", $tag );
        },
        $content
    );
}

Case 3: LCP Image Not Hinted to the Browser

The browser’s preload scanner will not discover a CSS background image or a lazily-loaded image until it builds the render tree. If your LCP element is a featured image, preload it in the <head> so the browser fetches it at the same time as the HTML:

add_action( 'wp_head', 'sudoall_preload_lcp_image', 1 );
function sudoall_preload_lcp_image() {
    if ( ! is_singular() ) return;
    $thumb_id = get_post_thumbnail_id();
    if ( ! $thumb_id ) return;
    $src = wp_get_attachment_image_url( $thumb_id, 'large' );
    if ( $src ) {
        echo '' . "\n";
    }
}
Layered caching architecture diagram: browser, full-page cache, Redis, OPcache, database
The full caching stack: each layer eliminates a different class of latency.

Layer 2: The Caching Stack

WordPress without caching is a PHP application that rebuilds every page from scratch on every request: parse PHP, load plugins, run sixty-odd database queries, render templates, and flush the output buffer to the client. A modern server can do this in 200–400 ms on a good day. Under any real traffic, MySQL connection queues start forming and TTFB climbs past 800 ms. Add the time for a mobile browser on 4G to receive and render those bytes and you have a 3-second LCP before the CSS even loads.

The solution is layered caching. Think of each layer as an earlier exit that avoids all the work below it.

PHP OPcache (Bytecode Caching)

PHP compiles every source file to bytecode before executing it. Without OPcache, this happens on every request. With OPcache enabled, the compiled bytecode is stored in shared memory and reused. For a WordPress site with hundreds of PHP files across core, plugins, and the theme, this is a substantial saving.

; In php.ini or a custom opcache.ini
opcache.enable=1
opcache.memory_consumption=128
opcache.interned_strings_buffer=16
opcache.max_accelerated_files=10000
opcache.revalidate_freq=60
opcache.fast_shutdown=1

Verify it is active inside the container: docker exec your-wordpress-container php -r "echo opcache_get_status()['opcache_enabled'] ? 'OPcache ON' : 'OFF';"

Redis Object Cache (Database Query Caching)

WordPress calls $wpdb->get_results() for things like sidebar widget listings, navigation menus, and term lookups on every page. Redis Object Cache (the plugin by Till Krüss) hooks into WordPress’s WP_Object_Cache API and stores query results in Redis, a sub-millisecond in-memory store. Repeat queries skip the database entirely.

# docker-compose.yml — add Redis as a sidecar
services:
  redis:
    image: redis:7-alpine
    restart: unless-stopped
    command: redis-server --maxmemory 128mb --maxmemory-policy allkeys-lru

  wordpress:
    depends_on:
      - redis
    environment:
      WORDPRESS_CONFIG_EXTRA: |
        define('WP_REDIS_HOST', 'redis');
        define('WP_REDIS_PORT', 6379);
        define('WP_REDIS_TIMEOUT', 1);
        define('WP_REDIS_READ_TIMEOUT', 1);

After connecting Redis, activate the Redis Object Cache plugin from the WordPress admin. The first page load primes the cache; subsequent loads skip the DB for cached data.

WP Super Cache (Full-Page Static HTML)

The deepest cache, and the most impactful for TTFB. WP Super Cache writes the fully rendered HTML of each page to disk as a static file. Apache (via mod_rewrite) serves this file directly, bypassing PHP and MySQL entirely. A cached page response time drops from 200–400 ms to under 5 ms.

# .htaccess — serve cached static files directly via mod_rewrite
# (WP Super Cache generates these rules; this is the HTTPS variant)
RewriteEngine On
RewriteBase /
RewriteCond %{REQUEST_METHOD} !POST
RewriteCond %{QUERY_STRING} ^$
RewriteCond %{HTTP:Cookie} !^.*(comment_author|wordpress_[a-f0-9]+|wp-postpass).*$
RewriteCond %{HTTPS} on
RewriteCond %{DOCUMENT_ROOT}/wp-content/cache/supercache/%{HTTP_HOST}%{REQUEST_URI}index-https.html -f
RewriteRule ^ wp-content/cache/supercache/%{HTTP_HOST}%{REQUEST_URI}index-https.html [L]

Cache Warm-Up: Don’t Leave Visitors on the Cold Path

The first visitor to any page after a cache flush or server restart hits the full PHP stack. For a blog with 100 published posts, that is 100 potential cold-hit requests. The fix is a warm-up script that crawls all published URLs immediately after any flush:

#!/bin/bash
# warm-cache.sh — pre-warm WP Super Cache for all published posts and pages
URLS=$(mysql -h 127.0.0.1 -u root -p"${MYSQL_ROOT_PASSWORD}" sudoall_prod \
  -se "SELECT CONCAT('https://sudoall.com', post_name) FROM wp_posts \
       WHERE post_status='publish' AND post_type IN ('post','page');")

echo "$URLS" | xargs -P8 -I{} curl -s -o /dev/null -w "%{url_effective} %{http_code}\n" {}
echo "Cache warm-up complete."

Schedule this with cron: 5 * * * * /srv/www/site/warm-cache.sh. Every hour, right after the cache TTL expires, it re-primes all pages.

Core Web Vitals diagram showing FCP, LCP, TBT and CLS metrics
Core Web Vitals: each metric maps to a specific user experience moment.

Layer 3: JavaScript and CSS Delivery

A browser can only do one thing at a time on the main thread. A <script> tag without defer or async halts HTML parsing completely until the script is downloaded, compiled, and executed. Stack ten plugins each adding a synchronous script to the <head> and your TBT climbs into the hundreds of milliseconds before the user sees a single pixel.

Defer Non-Critical JavaScript

WordPress’s script_loader_tag filter lets you inject defer or async onto any registered script handle. Add defer to everything that doesn’t need to run before the DOM is painted:

add_filter( 'script_loader_tag', 'sudoall_defer_scripts', 10, 2 );
function sudoall_defer_scripts( $tag, $handle ) {
    $defer = [ 'highlight-js', 'comment-reply', 'wp-embed' ];
    if ( in_array( $handle, $defer, true ) ) {
        return str_replace( ' src=', ' defer src=', $tag );
    }
    return $tag;
}

Remove jquery-migrate

WordPress loads jquery-migrate by default as a compatibility shim for plugins still using deprecated jQuery APIs from the 1.x era. If your theme and plugins don’t need it, it is dead weight on every page load. The correct removal (without breaking jQuery) is via wp_default_scripts:

add_action( 'wp_default_scripts', function( $scripts ) {
    if ( isset( $scripts->registered['jquery'] ) ) {
        $scripts->registered['jquery']->deps = array_diff(
            $scripts->registered['jquery']->deps,
            [ 'jquery-migrate' ]
        );
    }
} );

Lazy-Load Syntax Highlighting

If your blog has code blocks, you’re probably loading a syntax highlighter like highlight.js on every page, including pages with no code at all. The fix: use IntersectionObserver to load the highlighter only when a <pre><code> block actually enters the viewport.

document.addEventListener('DOMContentLoaded', function () {
  var codeBlocks = document.querySelectorAll('pre code');
  if (!codeBlocks.length) return;  // no code on this page — don't load anything

  function loadHighlighter() {
    if (window._hljs_loaded) return;
    window._hljs_loaded = true;
    var link = document.createElement('link');
    link.rel = 'stylesheet';
    link.href = '/wp-content/themes/your-theme/css/arcaia-dark.css';
    document.head.appendChild(link);
    var script = document.createElement('script');
    script.src = '/wp-content/plugins/...highlight.min.js';
    script.onload = function () { hljs.highlightAll(); };
    document.head.appendChild(script);
  }

  if ('IntersectionObserver' in window) {
    var obs = new IntersectionObserver(function (entries) {
      entries.forEach(function (e) { if (e.isIntersecting) { loadHighlighter(); obs.disconnect(); } });
    });
    codeBlocks.forEach(function (el) { obs.observe(el); });
  } else {
    setTimeout(loadHighlighter, 2000);  // fallback for older browsers
  }
});

Async Load Non-Critical CSS

Google Fonts, icon libraries, and syntax-highlight stylesheets are not needed before the first paint. The media="print" trick loads them asynchronously: a print stylesheet is non-blocking, and the onload handler switches it to all once it has downloaded.

add_filter( 'style_loader_tag', 'sudoall_async_non_critical_css', 10, 2 );
function sudoall_async_non_critical_css( $html, $handle ) {
    $async_handles = [ 'google-fonts', 'font-awesome', 'arcaia-dark' ];
    if ( in_array( $handle, $async_handles, true ) ) {
        $html = str_replace( "media='all'", "media='print' onload=\"this.media='all'\"", $html );
        $html .= '';
    }
    return $html;
}

Important caveat: do not async-load any CSS that controls above-the-fold layout. If Bootstrap or your grid system loads asynchronously, elements will visibly jump as it arrives, spiking your CLS score. Layout-critical CSS must stay synchronous or be inlined in the <head>.

Remove Unused Block Library CSS

If you don’t use Gutenberg blocks on the front-end, WordPress is loading wp-block-library.css (and related stylesheets) on every page for nothing. Dequeue them:

add_action( 'wp_enqueue_scripts', function () {
    wp_dequeue_style( 'wp-block-library' );
    wp_dequeue_style( 'wp-block-library-theme' );
    wp_dequeue_style( 'global-styles' );
}, 100 );
JavaScript loading waterfall showing blocking vs deferred scripts
Deferred vs blocking scripts: the same assets, in the same order, with a completely different effect on main-thread availability.

Layer 4: Browser Caching and Static Asset Versioning

Every returning visitor should get CSS, JS, fonts, and images from their local browser cache, not your server. Without explicit cache headers, most browsers apply heuristic caching, which is inconsistent and often too short. Set them explicitly in .htaccess:

<IfModule mod_expires.c>
    ExpiresActive On
    ExpiresByType text/css              "access plus 1 year"
    ExpiresByType application/javascript "access plus 1 year"
    ExpiresByType image/jpeg            "access plus 1 year"
    ExpiresByType image/png             "access plus 1 year"
    ExpiresByType image/webp            "access plus 1 year"
    ExpiresByType font/woff2            "access plus 1 year"
    ExpiresByType text/html             "access plus 1 hour"
</IfModule>

<IfModule mod_headers.c>
    <FilesMatch "\.(css|js|jpg|jpeg|png|webp|woff2|gif|ico|svg)$">
        Header set Cache-Control "public, max-age=31536000, immutable"
    </FilesMatch>
</IfModule>

One year is fine for assets provided you bust the cache when they change. The standard approach: append a version query string. The common mistake in WordPress themes is using time() as the version, which generates a new query string on every page load and defeats caching entirely:

// ❌ This busts the cache on every single request
wp_enqueue_style( 'my-theme', get_stylesheet_uri(), [], time() );

// ✅ This respects the cache until you actually change the file
wp_enqueue_style( 'my-theme', get_stylesheet_uri(), [], '1.2.6' );

“The ‘immutable’ extension in a Cache-Control response header indicates to a client that the response body will not change over time… clients should not send conditional revalidation requests for the response.” — RFC 8246, HTTP Immutable Responses

When These Optimisations Are Overkill

Not every site needs all of this. If you run a private internal tool, a staging site, or a low-traffic blog where perceived performance genuinely doesn’t matter, a full caching stack is added complexity for no real user benefit. Redis and WP Super Cache both introduce cache invalidation problems: publish a post, and the homepage is stale until the next warm-up. For a site with a small team editing content frequently, you’ll spend more time debugging stale pages than you save in load times.

Similarly, the async CSS trick is wrong for sites where the theme’s layout CSS is above-the-fold critical. Apply it only to supplementary stylesheets like icon libraries and syntax themes. When in doubt, keep layout CSS synchronous and async everything else.

What to Check Right Now

  • Run PageSpeed Insightspagespeed.web.dev on your homepage. Identify your worst metric: is it TBT (JavaScript), LCP (images or no cache), or CLS (missing dimensions)?
  • Check image sizesfind /var/www/html/wp-content/uploads -name "*.jpg" -size +500k | wc -l from inside your container. If the count is more than 0, start with mogrify.
  • Verify OPcachephp -r "var_dump(opcache_get_status()['opcache_enabled']);" inside the PHP container. Should be bool(true).
  • Check for jquery-migrate — view source on your homepage and search for jquery-migrate in the script tags. If it is there and your theme doesn’t need legacy jQuery, remove it.
  • Check time() in enqueue callsgrep -r "time()" wp-content/themes/your-theme/. Replace any occurrence used as a version number with a static string.
  • Verify Cache-Control headerscurl -I https://yourdomain.com/wp-content/themes/your-theme/style.css | grep -i cache. You should see max-age=31536000.
  • Check for full-page cachingcurl -s -I https://yourdomain.com/ | grep -i x-cache. If WP Super Cache is working, the response should come back in under 20 ms from a warm cache.
  • Protect your theme from WP updates — add Update URI: false to style.css and use a must-use plugin to filter site_transient_update_themes if the theme has a unique slug that could match a public theme.

nJoy 😉

How to quit ESXi SSH and leave background tasks running

In Linux when a console session is closed most background jobs (^Z and bg %n) will stop running when the parent ( the ssh session ) is closed because the parent sends a SIGHUP to all its children when closing (properly). Some programs can catch and ignore the SIGHUP or not handle it at all hence passing to the root init parent. The disown command in a shell removes a background job from the list to send SIGHUPs to.

In ESXi there is no disown command. However there is a way to close a shell immediately without issuing the SIGHUPs :

exec </dev/null >/dev/null 2>/dev/null

The exec command will run a command and switch it out for the current shell. Also this command will make sure the stdio and stderr are piped properly.

nJoy 😉

DHCP debugging with tcpdump


tcpdump filter to match DHCP packets including a specific Client MAC Address:

tcpdump -i br0 -vvv -s 1500 '((port 67 or port 68) and (udp[38:4] = 0x3e0ccf08))'

tcpdump filter to capture packets sent by the client (DISCOVER, REQUEST, INFORM):

tcpdump -i br0 -vvv -s 1500 '((port 67 or port 68) and (udp[8:1] = 0x1))'

Sample output :


 21:38:05.644153 IP (tos 0x0, ttl 64, id 32104, offset 0, flags [none], proto UDP (17), length 374)
     0.0.0.0.bootpc > 255.255.255.255.bootps: [udp sum ok] BOOTP/DHCP, Request from 12:42:82:cb:7a:7e (oui Unknown), length 346, xid 0xd01f0ad4, secs 18694, Flags [none] (0x0000)
   Client-Ethernet-Address 12:42:82:cb:7a:7e (oui Unknown)
   Vendor-rfc1048 Extensions
     Magic Cookie 0x63825363
     DHCP-Message Option 53, length 1: Discover
     Client-ID Option 61, length 7: ether 12:42:82:cb:7a:7e
     SLP-NA Option 80, length 0""
     NOAUTO Option 116, length 1: Y
     MSZ Option 57, length 2: 1472
     Vendor-Class Option 60, length 49: "dhcpcd-7.1.0:Linux-4.19.59-sunxi:armv7l:Allwinner"
     Hostname Option 12, length 11: "whiteorange"
     T145 Option 145, length 1: 1
     Parameter-Request Option 55, length 15: 
       Subnet-Mask, Classless-Static-Route, Static-Route, Default-Gateway
       Domain-Name-Server, Hostname, Domain-Name, MTU
       BR, NTP, Lease-Time, Server-ID
       RN, RB, Option 119
     END Option 255, length 0 

…And yes it is an orangepi zero for those playing at home..

nJoy 😉

Get ssh key fingerprint for comparing safely

SSh keys can be long and unwieldy to compare. Many platforms digest them to md5 formats for non disclosure such as github.

This command will give you the digested fingerprint of an ssh key in linux / Mac.

ssh-keygen -lf .ssh/id_rsa.pub -E md5

nJoy 😉

Get Days in a month from a bash script

Useful listing of days in a month to populate directories or run scripts for backing up getting the correct dates of days in a month and year.


YEAR=2020
MONTH=2

for DAY in $(DAYS=`cal $MONTH $YEAR | awk 'NF {DAYS = $NF}; END {print DAYS}'` && seq -f '%02G' $DAYS) ;do
DATE="$YEAR-$MONTH-$DAY"
echo $DATE
done

nJoy 😉

Automatically passing ssh password in scripts especially to ESX where passwordless ssh is hard

First you need to install sshpass.

  • Ubuntu/Debian: apt-get install sshpass
  • Fedora/CentOS: yum install sshpass
  • Arch: pacman -S sshpass

Example:

sshpass -p "YOUR_PASSWORD" ssh -o StrictHostKeyChecking=no YOUR_USERNAME@SOME_SITE.COM

Custom port example:

sshpass -p "YOUR_PASSWORD" ssh -o StrictHostKeyChecking=no YOUR_USERNAME@SOME_SITE.COM:2400

from : https://stackoverflow.com/questions/12202587/automatically-enter-ssh-password-with-script


This works better for me though for sshfs:

echo $mypassword | sshfs -o UserKnownHostsFile=/dev/null -o StrictHostKeyChecking=no user@host mountpoint -o workaround=rename -o password_stdin 


nJoy 😉


fail to mount ntfs in BSD

[root@ftp /mnt/test]# ntfs-3g /dev/da10s1 /mnt/test                                                                                 
fuse: failed to open fuse device: No such file or directory 

kldload fuse  

That’s a missing module needs loading.
nJoy 😉