
Tor’s proof-of-work puzzle system was designed as the one reliable defence against denial-of-service attacks on onion services. It was clever, it worked, and then a group of security researchers spent the better part of a year figuring out how to turn it into a weapon. The resulting family of attacks, dubbed OnionFlation, can take down any onion service for roughly $1.20 upfront and 10 cents an hour to maintain. The Tor project has acknowledged the issue. It is not yet patched.
Why Onion Services Have Always Been a DoS Magnet
Before understanding OnionFlation, you need to understand the original problem it was supposed to solve. Onion services have always been disproportionately easy to knock offline, and the reason is architectural. On the clearnet, denial-of-service defences rely on one thing above all else: knowing who is attacking you. Rate limiting, IP scrubbing, CAPTCHA walls, traffic shaping — all of these require visibility into the source of traffic. An onion service has none of that. The server never sees the client’s IP address; that is the entire point. So every standard DoS mitigation becomes inapplicable in one stroke.
The asymmetry goes further. When a malicious client wants to flood an onion service, it sends high-volume requests to the service’s introduction point over a single Tor circuit. But the server, upon receiving each request, must open a brand new Tor circuit to a different rendezvous point for every single one. Establishing a Tor circuit is computationally expensive: there is a full cryptographic key exchange at each hop. So the attacker pays once per circuit while the server pays once per request. This is the asymmetry that makes regular DoS against onion services so effective, and it has nothing to do with OnionFlation. It is just the baseline condition.
In 2023, these attacks reached a sustained peak. The Tor Project issued an official statement acknowledging the Tor network had been under heavy attack for seven months, and brought in additional team members specifically to design a structural fix.
How Onion Service Routing Actually Works
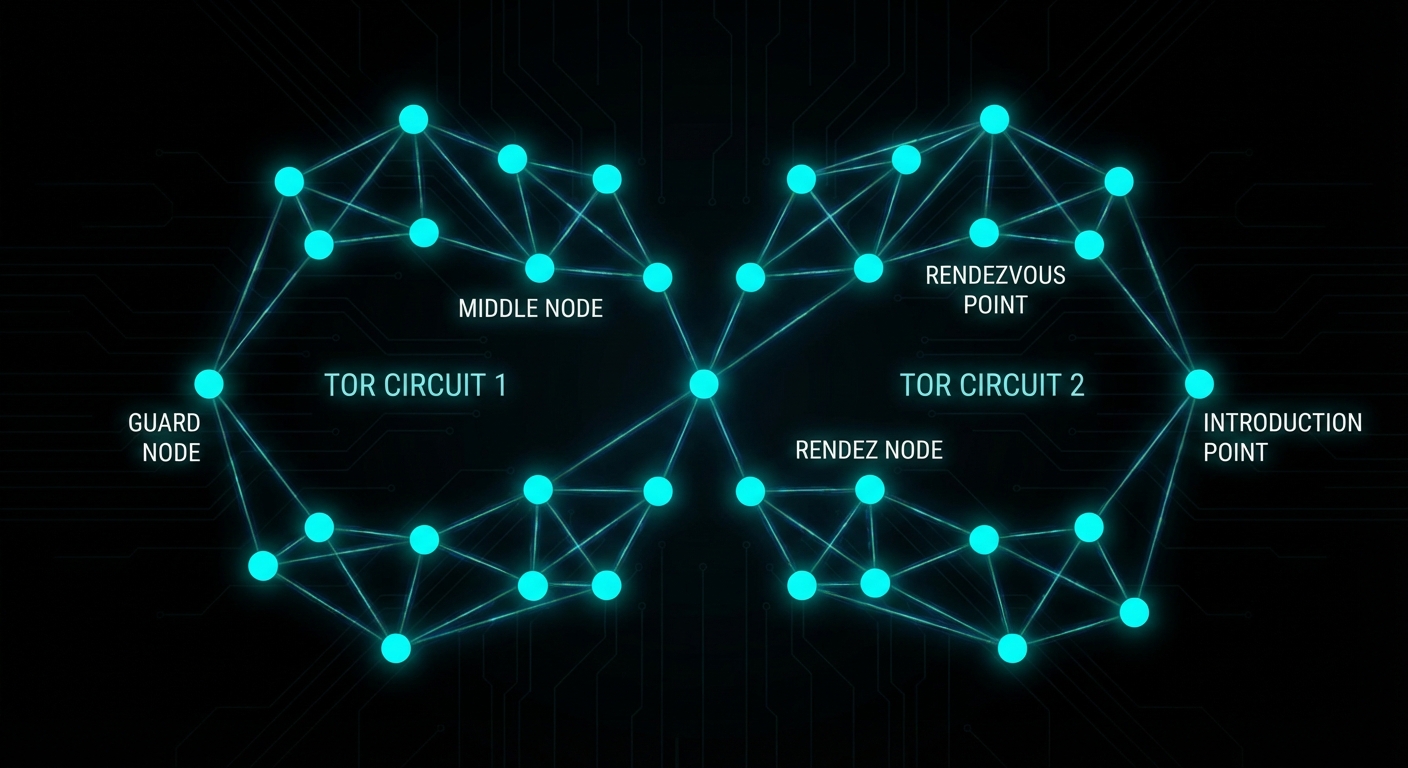
A quick detour is worth it here because the routing model is central to everything that follows. When you connect to a clearnet site over Tor, your traffic passes through three relays: a guard node, a middle node, and an exit node. The exit node then connects directly to the destination server, which sits outside Tor. The server’s IP address is public and the final hop is unencrypted (unless using HTTPS, but that is standard TLS at that point, nothing to do with Tor).
Onion services work differently. The server moves inside the Tor network. Before any clients connect, the server picks three ordinary Tor relays to act as introduction points and opens full three-hop Tor circuits to each of them. It then publishes a descriptor — containing its introduction points and its public key — into a distributed hash table spread across Tor’s network of directory servers. This is how clients discover how to reach the service.
When a client connects, the process looks like this:
# Simplified connection flow for an onion service

1. Client queries the distributed hash table for the onion URL
   → receives the list of introduction points

2. Client forms a 3-hop circuit to one introduction point

3. Client randomly selects a rendezvous point (any Tor relay)
   → forms a separate 2-hop circuit to it
   → sends the rendezvous point a secret "cookie" (a random token)

4. Client sends a message to the introduction point containing:
   - the rendezvous point's location
   - the cookie
   - all encrypted with the server's public key

5. Introduction point forwards the message to the server

6. Server forms a 3-hop circuit to the rendezvous point
   → presents the matching cookie

7. Rendezvous point stitches the two circuits together
   → client and server complete a cryptographic handshake
   → bidirectional encrypted communication begins
The end result is six hops total between client and server, with neither party knowing the other’s IP address. The rendezvous point is just blindly relaying encrypted traffic it cannot read. The price for this mutual anonymity is latency and, critically, the server-side cost of forming new Tor circuits on demand.
Tor’s Answer: Proof-of-Work Puzzles (2023)
In August 2023, after months of sustained DoS attacks against the Tor network, the Tor Project deployed a new defence: proof-of-work puzzles — specified in full in Proposal 327 and documented at the onion services security reference. The mechanism is conceptually simple. Before the server forms a rendezvous circuit, the client must first solve a cryptographic puzzle. The server adjusts the puzzle difficulty dynamically based on observed load, broadcasting the current difficulty level globally via the same distributed hash table used for descriptors.
Critically, the difficulty is global, not per-client. There is a reason for this: giving any individual feedback to a single client would require forming a circuit first, which is exactly the expensive operation we are trying to avoid. So the puzzle difficulty is a single number that all prospective clients must solve before the server will engage with them.
For a legitimate user making a single connection, a few extra seconds is a minor inconvenience. For an attacker trying to flood the server with hundreds of requests per second, the puzzle cost scales linearly and quickly becomes infeasible. The approach brilliantly flips the asymmetry: instead of the server bearing the circuit-formation cost, the attacker now bears a cryptographic puzzle cost for every single request it wants to send. According to the paper, under active attack conditions without PoW, 95% of clients could not connect at all. With PoW active, connection times under the same attack were nearly indistinguishable from a non-attacked baseline. It was, by any measure, a success.
OnionFlation: Weaponising the Defence
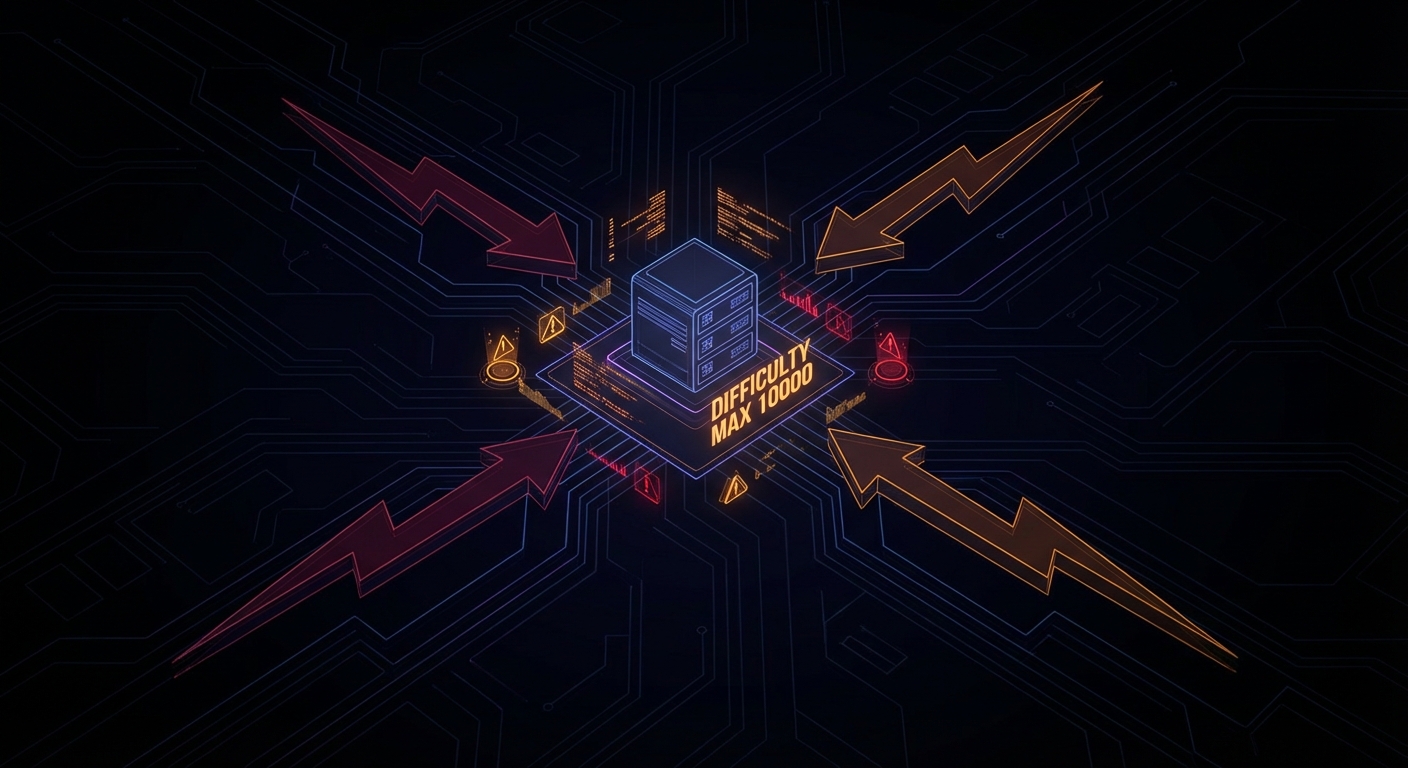
The paper Onions Got Puzzled, presented at USENIX Security 2025, identified a fundamental flaw in how the puzzle difficulty update algorithm works. Rather than trying to overpower the puzzle system, the attacks trick the server into raising its own puzzle difficulty to the maximum value (10,000) without actually putting it under meaningful load. Once the difficulty is at maximum, even high-end hardware struggles to solve a single puzzle within Tor Browser’s 90-second connection timeout.
The researchers developed four distinct attack strategies.
Strategy 1: EnRush
The server evaluates its congestion state once every five minutes, then broadcasts a difficulty update. It cannot do this more frequently because each update requires writing to the distributed hash table across Tor’s global relay network; frequent writes would overwhelm it.
The server’s congestion check looks at the state of its request queue at the end of the five-minute window. It checks not just how many requests are queued but their difficulty levels. A single high-difficulty unprocessed request is enough to trigger a large difficulty increase, because the server reasons: “if clients are solving hard puzzles and still can’t get through, congestion must be severe.”
The EnRush attacker simply sends a small burst of high-difficulty solved requests in the final seconds of the measurement window. For the vast majority of the five-minute interval the queue was empty, but the server only checks once. It sees high-difficulty requests sitting unprocessed, panics, and inflates the difficulty to the maximum. Cost: $1.20 per inflation event.
Strategy 2: Temporary Turmoil
Instead of sending a few hard requests, the attacker floods the server with a massive volume of cheap, low-difficulty requests. This exploits a flaw in the difficulty update formula:
next_difficulty = total_difficulty_of_all_arrived_requests
                  ÷
                  number_of_requests_actually_processed
The server’s request queue has a maximum capacity. When it fills up, the server discards half the queue to make room. When this happens, the numerator (all arrived requests, including discarded ones) becomes very large, while the denominator (only successfully processed requests) remains low. The formula outputs an absurdly high difficulty. Cost: $2.80.
Strategy 3: Choking
Once the difficulty is inflated to the maximum via EnRush or Temporary Turmoil, the server limits itself to 16 concurrent rendezvous circuit connections. The attacker sends 16 high-difficulty requests but deliberately leaves all 16 connections half-open by refusing to complete the rendezvous handshake. The server’s connection slots are now occupied by dead-end circuits. No new legitimate connections can be accepted even from users who successfully solved the maximum-difficulty puzzle. Cost: approximately $2 per hour to maintain.
Strategy 4: Maintenance
After inflating the difficulty, the attacker needs to stop the server from lowering it again. The server decreases difficulty when it sees an empty queue at the measurement window. The maintenance strategy sends a small trickle of zero-difficulty requests, just enough to keep the queue non-empty. The current implementation counts requests regardless of their difficulty level, so even trivially cheap requests prevent the difficulty from dropping. Cost: 10 cents per hour.
The Theorem That Makes This Hard to Fix
The researchers did not just develop attacks. They also proved, mathematically, why this class of problem is fundamentally difficult to solve. This is where the paper becomes genuinely interesting beyond the exploit mechanics.
They demonstrate a perfect negative correlation between two properties any difficulty update algorithm could have:
- Congestion resistance: the ability to detect and respond to a real DoS flood, raising difficulty fast enough to throttle the attacker.
- Inflation resistance: the ability to resist being tricked into raising difficulty when there is no real load.
Theorem 1: No difficulty update algorithm can be simultaneously resistant to both congestion attacks and inflation attacks.
Maximising one property necessarily minimises the other. Tor’s current implementation sits at the congestion-resistant end of the spectrum, which is why OnionFlation attacks are cheap. Moving toward inflation resistance makes the system more vulnerable to genuine flooding attacks, which is what the PoW system was built to stop in the first place. As Martin notes in Clean Code, a system designed to solve one problem perfectly often creates the conditions for a new class of problem — the same logical structure applies here to protocol design.
The researchers tried five different algorithm tweaks. All of them failed to stop OnionFlation at acceptable cost. The best result pushed the attacker’s cost from $1.20 to $25 upfront and $0.50 an hour, which is still trivially affordable.
The Proposed Fix: Algorithm 2
After exhausting incremental tweaks, the researchers designed a new algorithm from scratch. Instead of taking a single snapshot of the request queue every five minutes, Algorithm 2 monitors the server’s dequeue rate: how fast it is actually processing requests in real time. This makes the difficulty tracking continuous rather than periodic, removing the window that EnRush exploits.
The algorithm exposes a parameter called delta that lets onion service operators tune their own trade-off between inflation resistance and congestion resistance. The results are considerably better:
# With Algorithm 2 (default delta):
# EnRush cost to reach max difficulty: $383/hour (vs $1.20 one-time previously)

# With delta increased slightly by the operator:
# EnRush cost: $459/hour

# Choking becomes moot because EnRush and Temporary Turmoil
# can no longer inflate the difficulty in the first place.
This is a 300x increase in attacker cost under the default configuration. The researchers tested it against the same attacker setup they used to validate the original OnionFlation attacks and found that Algorithm 2 completely prevented difficulty inflation via EnRush and Temporary Turmoil.
That said, the authors are careful to note this is one promising approach, not a proven optimal solution. The proof that no algorithm can fully resolve the trade-off still stands; Algorithm 2 just moves the dial considerably further toward inflation resistance while keeping congestion resistance viable.
Where Things Stand: Prop 362
The researchers responsibly disclosed their findings to the Tor Project in August 2024. The Tor Project acknowledged the issue and shortly afterwards opened Proposal 362, a redesign of the proof-of-work control loop that addresses the exact structural issues identified in the paper. As of the time of writing, Prop 362 is still marked open. The fix is not yet deployed.
The delay reflects the structural difficulty: any change to the global difficulty broadcast mechanism touches the entire Tor relay network, not just onion service code. Testing and rolling out changes at that scale without disrupting the live network is a non-trivial engineering problem, entirely separate from the cryptographic and algorithmic design questions.
What Onion Service Operators Can Do Right Now
The honest answer is: not much, beyond sensible hygiene. The vulnerability is in the PoW difficulty update mechanism, which operators cannot replace themselves. But the following steps reduce your exposure.
Keep Tor updated
When Prop 362 ships, update immediately. Track Tor releases at blog.torproject.org. The fix will be a daemon update.
# Debian/Ubuntu — keep Tor from the official Tor Project repo
apt-get update && apt-get upgrade tor
Do not disable PoW
Disabling proof-of-work entirely (HiddenServicePoWDefensesEnabled 0) removes the only available DoS mitigation and leaves you exposed to straightforward circuit-exhaustion flooding. OnionFlation is bad; unprotected flooding is worse. Leave it on.
Monitor difficulty in real time
If you have Tor’s metrics port enabled, you can track the live puzzle difficulty and get early warning of an inflation attack in progress:
# Watch the suggested effort metric live
watch -n 5 'curl -s http://127.0.0.1:9052/metrics | grep suggested_effort'

# Or pipe directly from the metrics port if configured
# tor config: MetricsPort 127.0.0.1:9052
A sudden jump to 10,000 with no corresponding load spike in your service logs is a strong indicator of an OnionFlation attack rather than a legitimate traffic event.
Keep your service lightweight
Algorithm 2 improves cost for the attacker considerably but does not eliminate inflation attacks entirely. Running a resource-efficient service (minimal memory footprint, fast request handling) means your server survives periods of elevated difficulty with less degradation for users who do manage to solve puzzles and connect.
Redundant introduction points
Tor allows specifying the number of introduction points (default 3, maximum as set in your Tor configuration). More introduction points spread the attack surface somewhat, though this is a marginal benefit since the OnionFlation attack operates via the puzzle difficulty mechanism, not by targeting specific introduction points.
# torrc: set higher introduction point count
# (consult your Tor version docs for exact directive)
HiddenServiceNumIntroductionPoints 5
Sources and Further Reading
- Onions Got Puzzled — USENIX Security 2025 paper (Lee et al.) — the original research describing OnionFlation and its proofs.
- Introducing Proof-of-Work Defence for Onion Services — Tor Project blog, August 2023.
- Tor Network Under DDoS Attack — Tor Project official statement on the 2023 attacks.
- Onion Services PoW Security Reference — Tor Project documentation on the proof-of-work system.
- Proposal 327: PoW Over Introduction — the original Tor spec introducing the PoW puzzle mechanism.
- Proposal 362: Update PoW Control Loop — the in-progress redesign addressing the OnionFlation findings. Currently open.
Video Attribution
Credit to Daniel Boctor for the original live demonstration of this attack, including compiling Tor from source to manually set the puzzle difficulty to 10,000 and showcasing the real-time impact on connection attempts. The full walkthrough is worth watching:
nJoy 😉
