Electrobun: 12MB Desktop Apps in Pure TypeScript, With a Security Model That Actually Works

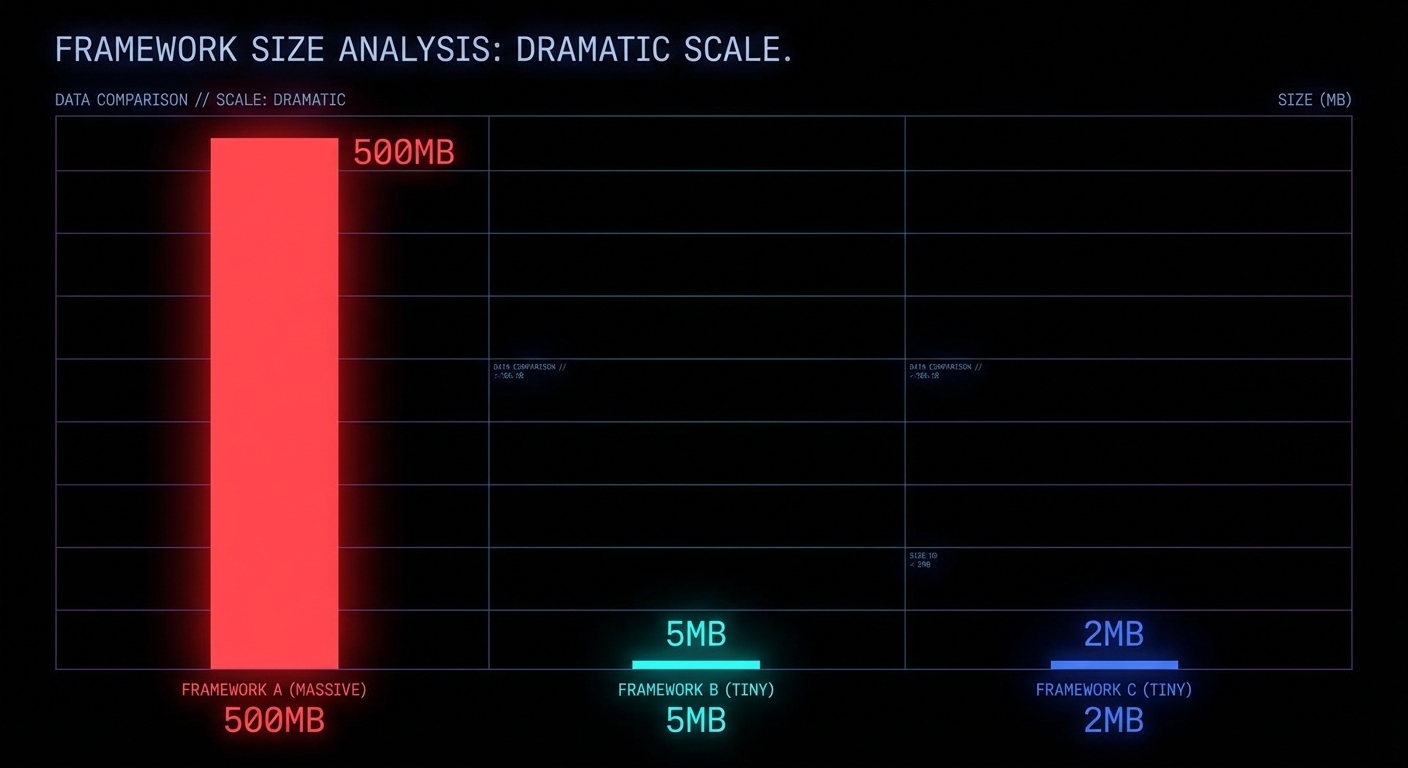
Electron apps ship 200MB of Chromium so your Slack can use 600MB of RAM to show you chat messages. Tauri fixes the size problem but demands you learn Rust. Electrobun offers a third path: 12MB desktop apps, pure TypeScript, native webview, sub-50ms startup, and a security model that actually thinks about process isolation from the ground up. If you are building internal tools, lightweight utilities, or anything that does not need to bundle an entire browser engine, this is worth understanding.

Dark size comparison diagram of Electron vs Tauri vs Electrobun bundle sizes
200MB vs 12MB. Same TypeScript, very different footprint.

What Electrobun Actually Is

Electrobun is a desktop app framework built on Bun as the backend runtime, with native bindings written in C++, Objective-C, and Zig. Instead of bundling Chromium, it uses the system’s native webview (WebKit on macOS, WebView2 on Windows, WebKitGTK on Linux), with an optional CEF (Chromium Embedded Framework) escape hatch if you genuinely need cross-platform rendering consistency. The architecture is a thin Zig launcher binary that boots a Bun process, which creates a web worker for your application code and initialises the native GUI event loop via FFI.

“Build cross-platform desktop applications with TypeScript that are incredibly small and blazingly fast. Electrobun combines the power of native bindings with Bun’s runtime for unprecedented performance.” — Electrobun Documentation

The result: self-extracting bundles around 12-14MB (most of which is the Bun runtime itself), startup under 50 milliseconds, and differential updates as small as 14KB using bsdiff. You distribute via a static file host like S3, no update server infrastructure required.

The Security Architecture: Process Isolation Done Right

This is where Electrobun makes its most interesting architectural decision. The framework implements Out-Of-Process IFrames (OOPIF) from scratch. Each <electrobun-webview> tag runs in its own isolated process, not an iframe sharing the parent’s process, not a Chromium webview tag (which was deprecated and scheduled for removal). A genuine, separate OS process with its own memory space and crash boundary.

This gives you three security properties that matter:

1. Process isolation. Content in one webview cannot access the memory, DOM, or state of another. If a webview crashes, it does not take the application down. If a webview loads malicious content, it cannot reach into the host process. This is the same security model that Chrome uses between tabs, but applied at the webview level inside your desktop app.

2. Sandbox mode for untrusted content. Any webview can be placed into sandbox mode, which completely disables RPC communication between the webview and your application code. No messages in, no messages out. The webview can still navigate and emit events, but it has zero access to your application’s APIs, file system, or Bun process. This is the correct default for loading any third-party content: assume hostile, prove otherwise.

<!-- Sandboxed: no RPC, no API access, no application interaction -->
<electrobun-webview
  src="https://untrusted-third-party.com"
  sandbox
  style="width: 100%; height: 400px;">
</electrobun-webview>

<!-- Trusted: full RPC and API access to your Bun process -->
<electrobun-webview
  src="views://settings/index.html"
  style="width: 100%; height: 400px;">
</electrobun-webview>

3. Typed RPC with explicit boundaries. Communication between the Bun main process and browser views uses a typed RPC system. Functions can be called across process boundaries and return values to the caller, but only when explicitly configured. Unlike Electron’s ipcMain/ipcRenderer pattern (which historically shipped with nodeIntegration: true by default, giving webviews full Node.js access), Electrobun’s RPC is opt-in per view and disabled entirely in sandbox mode.

“Complete separation between host and embedded content. Each webview runs in its own isolated process, preventing cross-contamination.” — Electrobun Documentation, Webview Tag Architecture

Where Electrobun Fits: The Use Cases

Internal enterprise tools. Dashboard viewers, log tailing UIs, config management panels. Things that need to be installed, run natively, and talk to local services. A 12MB installer that starts in under a second versus a 200MB Electron blob that takes three seconds to paint. For tooling that dozens or hundreds of employees install, the bandwidth and disk savings compound fast.

Lightweight utilities and tray apps. System tray applications, clipboard managers, quick-launchers, notification hubs. Electrobun ships with native tray, context menu, and application menu APIs. The low memory footprint makes it viable for always-running background utilities where Electron’s 150MB idle RAM cost is unacceptable.

Embedded webview hosts that load untrusted content. Any application that needs to embed third-party web content, browser panels, OAuth flows, embedded documentation, benefits from the OOPIF sandbox. The explicit sandbox mode with zero RPC is architecturally cleaner than Electron’s security patching history of gradually restricting what was originally too permissive.

Rapid prototyping for native-feel apps. If your team already writes TypeScript, the learning curve is close to zero. No Rust (unlike Tauri), no C++ (unlike Qt), no Java (unlike JavaFX). The bunx electrobun init scaffolding gets you to a running window in under a minute.

What to Know Before You Ship

  • Webview rendering varies by platform. WebKit on macOS, WebView2 on Windows, WebKitGTK on Linux. If you need pixel-identical cross-platform rendering, you will need the optional CEF bundle, which increases size significantly. Test on all three platforms before shipping.
  • The project is young. Electrobun is under active development. Evaluate the GitHub issue tracker and release cadence before betting production workloads on it. The architecture is sound, but ecosystem maturity is not at Electron’s level yet.
  • Code signing and notarisation are built in. Electrobun automatically handles macOS code signing and Apple notarisation if you provide credentials, which is a genuine quality-of-life win that many frameworks leave as an exercise for the developer.
  • The update mechanism is a competitive advantage. 14KB differential updates via bsdiff, hosted on a static S3 bucket behind CloudFront. No update server, no Squirrel, no electron-updater complexity. For teams that ship frequently, this alone might justify the switch.

nJoy πŸ˜‰

Video Attribution


This article expands on concepts discussed in “Electrobun Gives You 12MB Desktop Apps in Pure TypeScript” by KTG Analysis.

Essential AI Libraries for Node.js Developers

Getting started with AI in Node.js is simpler than you might think. The key libraries to know are:

1. OpenAI SDK

npm install openai

import OpenAI from 'openai';

const openai = new OpenAI({ apiKey: process.env.OPENAI_API_KEY });

const completion = await openai.chat.completions.create({
  model: 'gpt-4',
  messages: [{ role: 'user', content: 'Hello!' }]
});

console.log(completion.choices[0].message.content);

2. LangChain.js

For more complex chains and agents:

npm install langchain

3. Hugging Face Transformers

For local model inference:

npm install @huggingface/inference

These three libraries cover 90% of AI use cases in Node.js applications.

Streaming LLM Responses in Node.js with Server-Sent Events

Streaming responses from LLMs provides a much better UX. Here’s how to implement it properly:

import OpenAI from 'openai';
import { Readable } from 'stream';

const openai = new OpenAI();

async function streamChat(prompt) {
  const stream = await openai.chat.completions.create({
    model: 'gpt-4',
    messages: [{ role: 'user', content: prompt }],
    stream: true
  });

  for await (const chunk of stream) {
    const content = chunk.choices[0]?.delta?.content || '';
    process.stdout.write(content);
  }
}

await streamChat('Explain async iterators');

Express.js SSE Integration

app.get('/chat', async (req, res) => {
  res.setHeader('Content-Type', 'text/event-stream');
  res.setHeader('Cache-Control', 'no-cache');
  
  const stream = await openai.chat.completions.create({
    model: 'gpt-4',
    messages: [{ role: 'user', content: req.query.prompt }],
    stream: true
  });

  for await (const chunk of stream) {
    res.write(`data: ${JSON.stringify(chunk)}

`);
  }
  res.end();
});

Building a Vector Database Pipeline with Pinecone and Node.js

A vector database stores data as high-dimensional numeric arrays, embeddings, instead of rows and columns. When you search, you don’t match keywords; you find items that are semantically close in that space. Two sentences can share zero words and still be nearest neighbours if they mean the same thing. That’s why vector databases are the backbone of RAG (Retrieval-Augmented Generation): you embed a user’s question, retrieve the most relevant document chunks from the database, and hand those chunks to the LLM as context. The LLM answers from evidence rather than from weights alone, grounded, citable, and up to date with your own data.

How embeddings work

An embedding model (like OpenAI’s text-embedding-3-small) reads a piece of text and outputs a list of floats, typically 1,536 of them. Each float encodes some aspect of meaning learned during training. The distance between two vectors (cosine similarity is standard) measures semantic closeness: 1.0 means identical in meaning, 0 means unrelated, negative means opposite. The magic is that this geometry is compositional: “Paris” minus “France” plus “Italy” lands near “Rome”. You don’t program these relationships, they emerge from training on billions of documents.

Vector space similarity diagram
Queries and documents live in the same space. Nearest-neighbour search retrieves the most semantically relevant matches.

The full pipeline

The pipeline has two phases: ingestion (offline, runs once or on update) and retrieval (online, runs per query). During ingestion you chunk your documents, embed each chunk, and upsert into Pinecone. During retrieval you embed the query, call Pinecone’s query endpoint, and get back the top-K most similar chunks. Those chunks become the context you inject into the LLM prompt.

RAG pipeline diagram
The full RAG flow: embed the query β†’ search Pinecone β†’ retrieve chunks β†’ inject into LLM β†’ get a grounded answer.

Step 1: Setup

npm install @pinecone-database/pinecone openai

Create a free Pinecone index at pinecone.io. Set dimension to 1536 (matches text-embedding-3-small) and metric to cosine. Store both keys in .env:

PINECONE_API_KEY=your-pinecone-key
OPENAI_API_KEY=your-openai-key
// client.js
import { Pinecone } from '@pinecone-database/pinecone';
import OpenAI from 'openai';

export const pinecone = new Pinecone({ apiKey: process.env.PINECONE_API_KEY });
export const openai   = new OpenAI({ apiKey: process.env.OPENAI_API_KEY });
export const index    = pinecone.index('documents');

Step 2: Chunk your documents

Embedding models have token limits (8,191 for text-embedding-3-small). More importantly, a chunk that’s too large drowns the signal, a paragraph about your answer might be buried inside a 5,000-word chunk. Aim for 200–500 words per chunk with a small overlap so context doesn’t get cut at chunk boundaries.

Document chunking diagram
Overlapping chunks prevent context loss at boundaries. Each chunk gets an ID and is embedded independently.
// chunker.js

/**
 * Split text into overlapping chunks.
 * @param {string} text        - Full document text
 * @param {number} chunkSize   - Target chars per chunk (default 1200 β‰ˆ 300 words)
 * @param {number} overlap     - Overlap chars between chunks (default 200)
 * @returns {string[]}
 */
export function chunkText(text, chunkSize = 1200, overlap = 200) {
  const chunks = [];
  let start = 0;

  while (start < text.length) {
    const end = Math.min(start + chunkSize, text.length);
    chunks.push(text.slice(start, end).trim());
    if (end === text.length) break;
    start += chunkSize - overlap; // step back by overlap amount
  }

  return chunks.filter(c => c.length > 50); // drop tiny trailing chunks
}

Step 3: Embed in batches and upsert

OpenAI’s embeddings endpoint accepts up to 2,048 inputs per call. Batching is faster and cheaper than one call per chunk. After embedding, upsert to Pinecone with a stable ID and metadata. The metadata is what comes back in query results, store everything you’ll need to display or cite the source.

// ingest.js
import { openai, index } from './client.js';
import { chunkText }     from './chunker.js';

const EMBED_MODEL  = 'text-embedding-3-small';
const BATCH_SIZE   = 100; // chunks per OpenAI call

/**
 * Embed an array of strings in batches.
 */
async function embedBatch(texts) {
  const res = await openai.embeddings.create({
    model: EMBED_MODEL,
    input: texts,
  });
  return res.data.map(d => d.embedding); // array of float[]
}

/**
 * Ingest a document into Pinecone.
 * @param {string} docId    - Stable identifier for this document
 * @param {string} text     - Full document text
 * @param {object} meta     - Extra metadata (title, url, date, etc.)
 */
export async function ingestDocument(docId, text, meta = {}) {
  const chunks  = chunkText(text);
  const vectors = [];

  // Embed in batches of BATCH_SIZE
  for (let i = 0; i < chunks.length; i += BATCH_SIZE) {
    const batch      = chunks.slice(i, i + BATCH_SIZE);
    const embeddings = await embedBatch(batch);

    embeddings.forEach((embedding, j) => {
      const chunkIndex = i + j;
      vectors.push({
        id: `${docId}__chunk_${chunkIndex}`,
        values: embedding,
        metadata: {
          ...meta,
          docId,
          chunkIndex,
          text: chunks[chunkIndex], // store chunk text for retrieval
        },
      });
    });
  }

  // Upsert to Pinecone (max 100 vectors per call)
  for (let i = 0; i < vectors.length; i += 100) {
    await index.upsert(vectors.slice(i, i + 100));
  }

  console.log(`Ingested ${vectors.length} chunks for doc: ${docId}`);
}

// --- Usage example ---
await ingestDocument(
  'nodejs-docs-v20',
  await fs.readFile('nodejs-docs.txt', 'utf8'),
  { title: 'Node.js v20 Docs', url: 'https://nodejs.org/docs/v20/' }
);

Step 4: Query and retrieve

At query time: embed the user's question, search Pinecone for the top-K nearest chunks, and return them. Pinecone also supports metadata filtering so you can narrow results to a specific document, date range, or tag, without re-embedding.

// retrieve.js
import { openai, index } from './client.js';

const EMBED_MODEL = 'text-embedding-3-small';

/**
 * Retrieve the top-K most relevant chunks for a query.
 * @param {string} query    - User's natural language question
 * @param {number} topK     - Number of results (default 5)
 * @param {object} filter   - Optional Pinecone metadata filter
 * @returns {Array<{text, score, meta}>}
 */
export async function retrieve(query, topK = 5, filter = {}) {
  // 1. Embed the query
  const res = await openai.embeddings.create({
    model: EMBED_MODEL,
    input: query,
  });
  const queryVector = res.data[0].embedding;

  // 2. Search Pinecone
  const results = await index.query({
    vector:          queryVector,
    topK,
    includeMetadata: true,
    filter:          Object.keys(filter).length ? filter : undefined,
  });

  // 3. Return clean objects
  return results.matches.map(m => ({
    text:  m.metadata.text,
    score: m.score,         // cosine similarity 0–1
    meta:  m.metadata,
  }));
}

// --- With metadata filter (only search a specific doc) ---
const chunks = await retrieve(
  'How do I use async iterators?',
  5,
  { docId: { $eq: 'nodejs-docs-v20' } }
);

Step 5: Wire it into a RAG answer

Now put it all together: retrieve relevant chunks, build a prompt, call the LLM. The key is to pass the chunks as explicit context and instruct the model to answer only from them, this is what gives you grounded, citable responses instead of hallucinations.

// rag.js
import { openai }  from './client.js';
import { retrieve } from './retrieve.js';

/**
 * Answer a question using RAG over your Pinecone index.
 * @param {string} question
 * @param {object} filter    - Optional metadata filter
 * @returns {string}         - LLM answer
 */
export async function ragAnswer(question, filter = {}) {
  // 1. Retrieve relevant chunks
  const chunks = await retrieve(question, 5, filter);

  if (chunks.length === 0) {
    return "I couldn't find relevant information in the knowledge base.";
  }

  // 2. Build context block
  const context = chunks
    .map((c, i) => `[${i + 1}] (score: ${c.score.toFixed(3)})n${c.text}`)
    .join('nn---nn');

  // 3. Build prompt
  const systemPrompt = `You are a helpful assistant. Answer the user's question
using ONLY the context provided below. If the answer is not in the context,
say so. Cite the chunk number [1], [2], etc. where relevant.

CONTEXT:
${context}`;

  // 4. Call the LLM
  const completion = await openai.chat.completions.create({
    model:    'gpt-4o-mini',
    messages: [
      { role: 'system',  content: systemPrompt },
      { role: 'user',    content: question },
    ],
    temperature: 0.2, // low temperature = more faithful to context
  });

  return completion.choices[0].message.content;
}

// --- Example ---
const answer = await ragAnswer(
  'What changed in the streams API in Node.js v20?',
  { docId: { $eq: 'nodejs-docs-v20' } }
);
console.log(answer);

Practical tips

  • Delete old chunks when you update a document, use a consistent naming scheme like docId__chunk_N so you can delete all chunks for a doc before re-ingesting: index.deleteMany({ docId: { $eq: docId } }) (requires a paid Pinecone plan for filter-based delete; alternatively delete by ID prefix).
  • Score thresholds, don't blindly pass all top-K to the LLM. Filter out chunks with score below ~0.75; they're probably noise. Low scores mean your query is outside what the index knows.
  • Namespace isolation, use Pinecone namespaces to keep multi-tenant data separate: index.namespace('tenant-abc').upsert(...). Free plans have no namespace limit.
  • Hybrid search, Pinecone's sparse-dense hybrid mode lets you combine BM25 keyword matching with vector similarity. Useful when exact terms matter (product codes, names) alongside semantic meaning.
  • Cost, embedding 1M tokens with text-embedding-3-small costs $0.02. A typical 1,000-page knowledge base (~500K words) costs under $2 to embed. Re-embedding only changed documents keeps costs minimal.

nJoy πŸ˜‰

Implementing OpenAI Function Calling in Node.js

Function calling lets LLMs interact with your APIs. Here’s a production pattern:

const tools = [{
  type: 'function',
  function: {
    name: 'get_weather',
    description: 'Get current weather for a location',
    parameters: {
      type: 'object',
      properties: {
        location: { type: 'string', description: 'City name' },
        unit: { type: 'string', enum: ['celsius', 'fahrenheit'] }
      },
      required: ['location']
    }
  }
}];

const functions = {
  get_weather: async ({ location, unit = 'celsius' }) => {
    // Your API call here
    return { temp: 22, condition: 'sunny', location };
  }
};

async function chat(message) {
  const response = await openai.chat.completions.create({
    model: 'gpt-4',
    messages: [{ role: 'user', content: message }],
    tools
  });

  const toolCalls = response.choices[0].message.tool_calls;
  if (toolCalls) {
    for (const call of toolCalls) {
      const fn = functions[call.function.name];
      const args = JSON.parse(call.function.arguments);
      const result = await fn(args);
      console.log(result);
    }
  }
}

Running Local LLMs with Ollama and Node.js

Run LLMs locally without API costs using Ollama:

# Install Ollama
curl -fsSL https://ollama.ai/install.sh | sh

# Pull a model
ollama pull llama2
ollama pull codellama

Node.js Integration

npm install ollama

import { Ollama } from 'ollama';

const ollama = new Ollama();

// Simple completion
const response = await ollama.chat({
  model: 'llama2',
  messages: [{ role: 'user', content: 'Explain closures in JS' }]
});

console.log(response.message.content);

// Streaming
const stream = await ollama.chat({
  model: 'codellama',
  messages: [{ role: 'user', content: 'Write a fibonacci function' }],
  stream: true
});

for await (const chunk of stream) {
  process.stdout.write(chunk.message.content);
}

Memory Requirements

  • 7B models: 8GB RAM
  • 13B models: 16GB RAM
  • 70B models: 64GB+ RAM

Rate Limiting AI API Calls in Node.js with Bottleneck

Rate limiting is critical for AI APIs. Here’s a robust implementation:

import Bottleneck from 'bottleneck';

const limiter = new Bottleneck({
  reservoir: 60,           // 60 requests
  reservoirRefreshAmount: 60,
  reservoirRefreshInterval: 60 * 1000, // per minute
  maxConcurrent: 5,
  minTime: 100             // 100ms between requests
});

// Wrap OpenAI calls
const rateLimitedChat = limiter.wrap(async (prompt) => {
  return openai.chat.completions.create({
    model: 'gpt-4',
    messages: [{ role: 'user', content: prompt }]
  });
});

// Use with automatic queuing
const results = await Promise.all(
  prompts.map(p => rateLimitedChat(p))
);

Exponential Backoff

async function withRetry(fn, maxRetries = 3) {
  for (let i = 0; i < maxRetries; i++) {
    try {
      return await fn();
    } catch (e) {
      if (e.status === 429 && i < maxRetries - 1) {
        await new Promise(r => setTimeout(r, Math.pow(2, i) * 1000));
      } else throw e;
    }
  }
}

Building Autonomous AI Agents with LangChain.js

LangChain agents can use tools autonomously. Here’s a complete agent setup:

import { ChatOpenAI } from '@langchain/openai';
import { AgentExecutor, createOpenAIToolsAgent } from 'langchain/agents';
import { DynamicTool } from '@langchain/core/tools';
import { ChatPromptTemplate } from '@langchain/core/prompts';

const tools = [
  new DynamicTool({
    name: 'calculator',
    description: 'Performs math calculations',
    func: async (input) => {
      return String(eval(input)); // Use mathjs in production
    }
  }),
  new DynamicTool({
    name: 'search',
    description: 'Search the web',
    func: async (query) => {
      // Your search API here
      return `Results for: ${query}`;
    }
  })
];

const llm = new ChatOpenAI({ model: 'gpt-4' });
const prompt = ChatPromptTemplate.fromMessages([
  ['system', 'You are a helpful assistant with access to tools.'],
  ['human', '{input}'],
  ['placeholder', '{agent_scratchpad}']
]);

const agent = await createOpenAIToolsAgent({ llm, tools, prompt });
const executor = new AgentExecutor({ agent, tools });

const result = await executor.invoke({
  input: 'What is 25 * 48 and search for Node.js news'
});

Implementing LLM Response Caching with Redis

Caching LLM responses saves money and improves latency:

import { createHash } from 'crypto';
import Redis from 'ioredis';

const redis = new Redis();
const CACHE_TTL = 3600; // 1 hour

function hashPrompt(messages, model) {
  const content = JSON.stringify({ messages, model });
  return createHash('sha256').update(content).digest('hex');
}

async function cachedChat(messages, options = {}) {
  const { model = 'gpt-4', bypassCache = false } = options;
  const cacheKey = `llm:${hashPrompt(messages, model)}`;

  if (!bypassCache) {
    const cached = await redis.get(cacheKey);
    if (cached) {
      console.log('Cache HIT');
      return JSON.parse(cached);
    }
  }

  console.log('Cache MISS');
  const response = await openai.chat.completions.create({
    model,
    messages
  });

  await redis.setex(cacheKey, CACHE_TTL, JSON.stringify(response));
  return response;
}

Semantic Caching

For similar (not exact) queries, use embedding similarity with a threshold.

Text Chunking Strategies for RAG Applications

Chunking strategies greatly affect RAG quality:

import { RecursiveCharacterTextSplitter } from 'langchain/text_splitter';

// Basic chunking
const splitter = new RecursiveCharacterTextSplitter({
  chunkSize: 1000,
  chunkOverlap: 200,
  separators: ['

', '
', ' ', '']
});

const chunks = await splitter.splitText(document);

Semantic Chunking

async function semanticChunk(text, maxTokens = 500) {
  const sentences = text.match(/[^.!?]+[.!?]+/g) || [text];
  const chunks = [];
  let current = [];
  let tokenCount = 0;

  for (const sentence of sentences) {
    const tokens = sentence.split(/s+/).length; // Approximate
    if (tokenCount + tokens > maxTokens && current.length) {
      chunks.push(current.join(' '));
      current = [];
      tokenCount = 0;
    }
    current.push(sentence);
    tokenCount += tokens;
  }
  if (current.length) chunks.push(current.join(' '));
  return chunks;
}

Best Practices

  • Chunk size: 500-1000 tokens
  • Overlap: 10-20% for context
  • Preserve semantic boundaries